An order bump is a feature that allows you to display an additional product on your checkout form. On average 10-30% of your buyers add on an order bump to their purchase. So, it is a great way to increase your average transaction value.
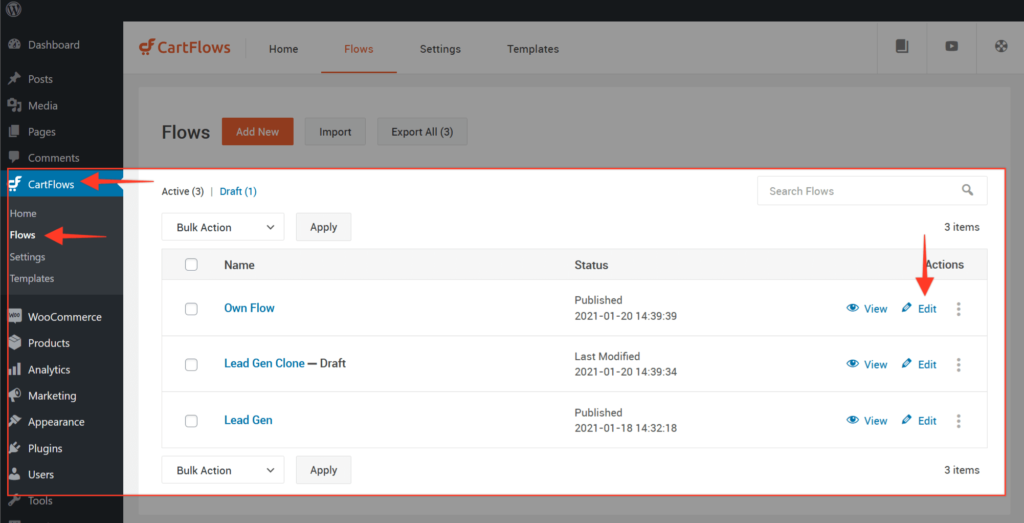
From the WordPress dashboard, edit a Flow from Cartflows > Flows.
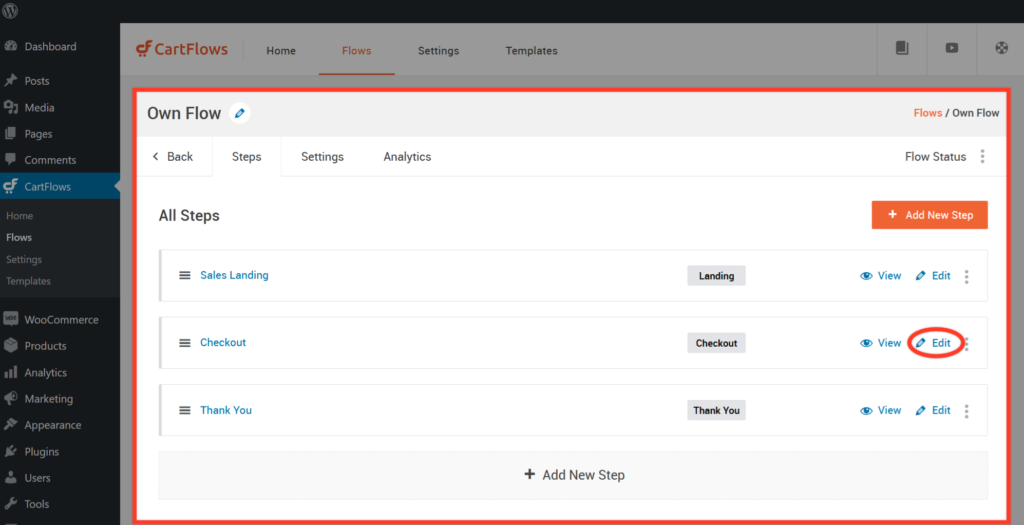
Get into the settings of the Checkout Page by clicking on Edit.
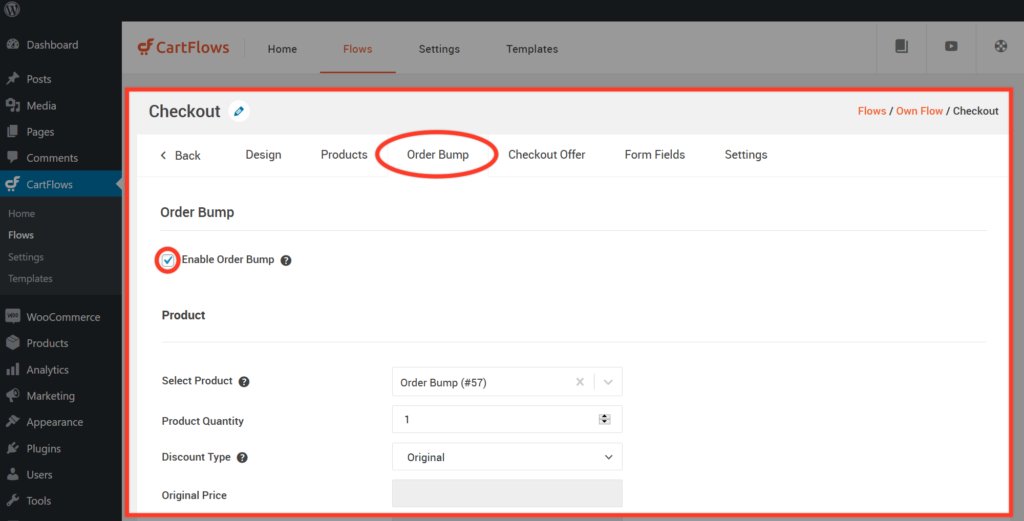
Scroll down in the Checkout Layout section and click the Order Bump option. Tick the Enable Order Bump checkbox and the configuration options for the order bump will display.
Bump Order Skin – You can choose your bump order skin between Style 1 and Style 2.


Select Product – Enter 3 or more characters to display the product for your order bump.
Bump Order Position – This is where you would like to place your order bump in the checkout page. It can either be Before Checkout, After Customer Details, After Order, or After Payment.
Product Image – You can select an image of the product to attract your customers.
Checkbox Label – Customize the label of the checkbox or leave it as it is.
Highlight Text – This is the title of your order bump. It could be a message with a sense of urgency to get your customers to take action.
Product Description – This is where you can add the details of your order bump product.
Discount Type – You can choose to offer your order bump at an original price or discounted one by percentage, specific price, or coupon. Enter the discount value or the coupon and it will be automatically calculated once you saved the Step.
Bump Order Style – You can customize the look and feel of your bump order by tweaking the options available in the Bump Order Style. These include:
- Border Style
- Border Color
- Background Color
- Label Color
- Label Background Color
- Description Text Color
- Highlight Text Color


