Currently, we have only added the Authorize.Net’s Credit Card support in the CartFlows v1.5.1 for the Upsell & Downsell.
Let’s see the steps to set up.
Pre-requisites
There are a few Pre-requisites like –
- You need to create an Authorize.Net account. How to Setup? You can follow the steps here. Get the Transaction Key we will require in the next step.
- Next, you need to install and activate the official WooCommerce Authorize.Net Gateway plugin available on the WooCommerce store or from the official website.
Steps to Setup Authorize.Net in the WooCommerce Settings –
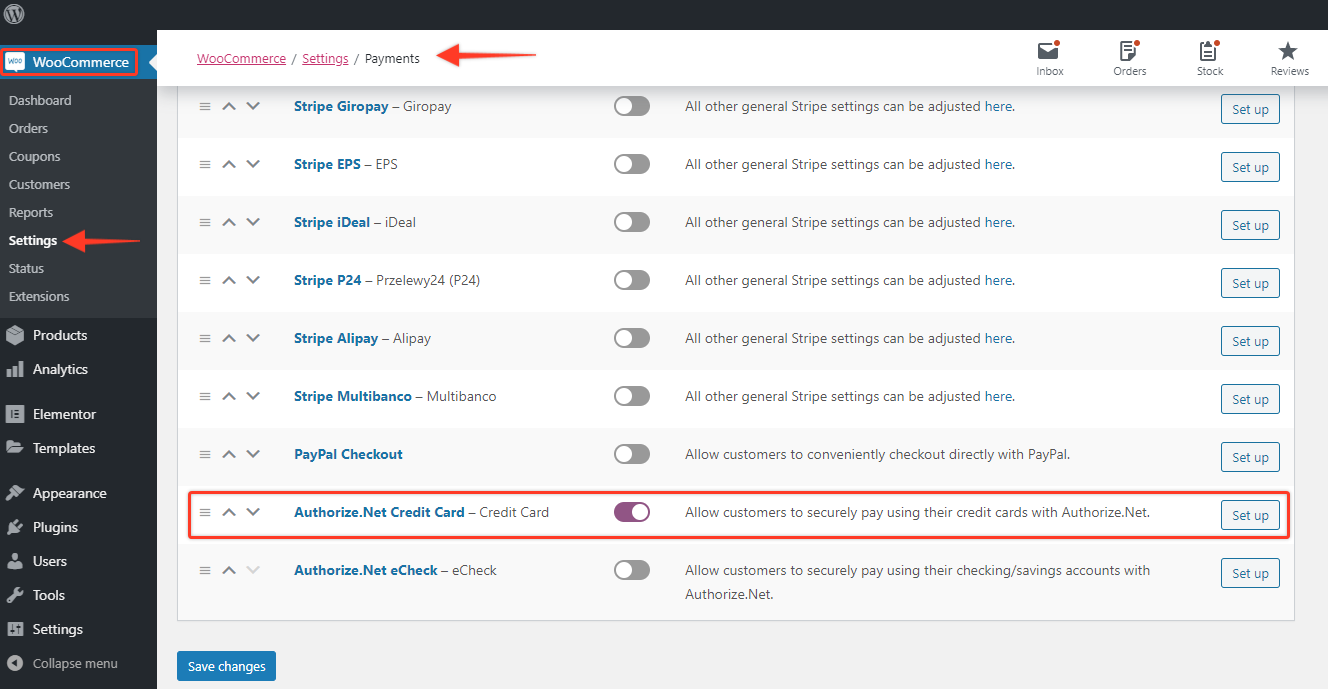
Step 1: From your WordPress Dashboard, go to – WooCommerce -> Settings -> Payments Tab -> Enable the “Authorize.Net Credit Card” option
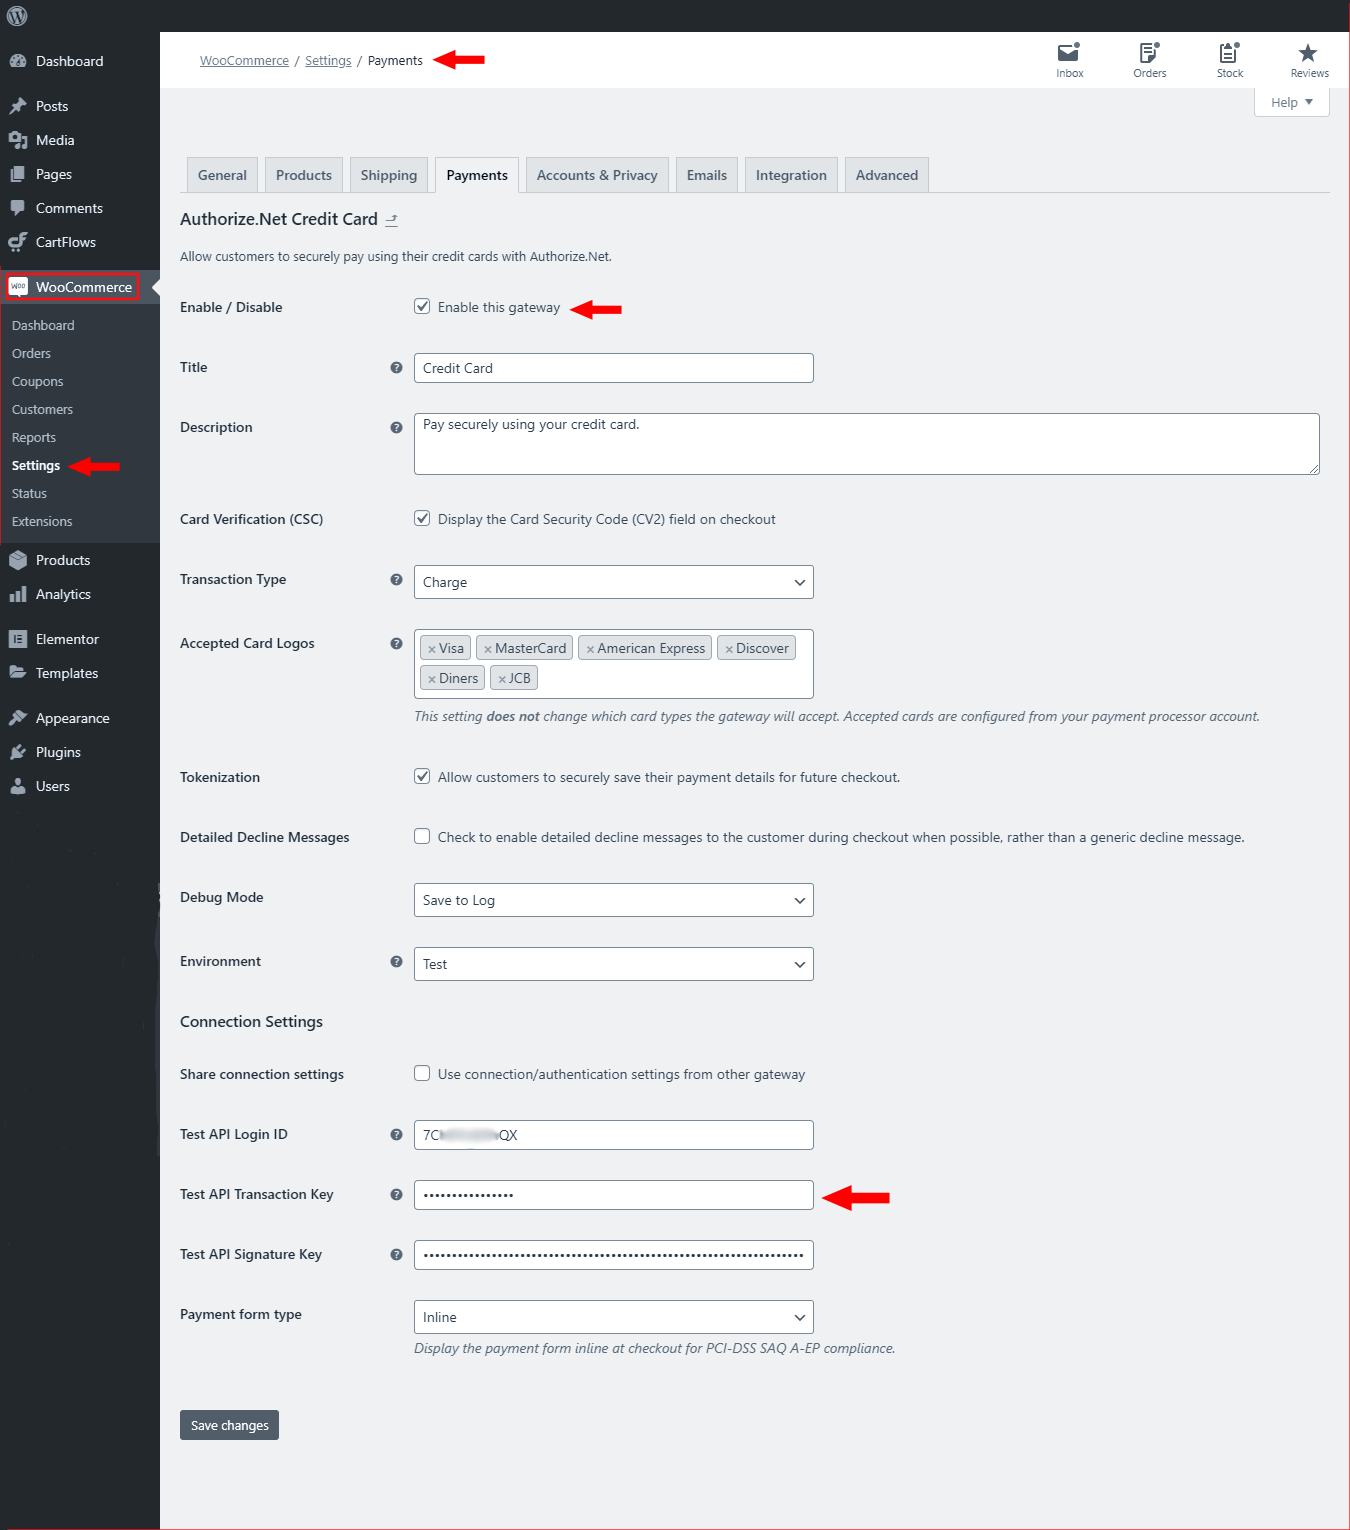
Step 2: Now paste the Transaction Key copied while creating the Authorize.Net account here and Save the keys.
Important Fields in this section to be Set / Enabled –
- Transaction Type: Here set the field as Charge
- Tokenization: This option has to be enabled for the option to be seen on Checkout, Upsell & Downsell Page of CartFlows
- Debug Mode: This option should be set to Save to Log so that it can store any error logs
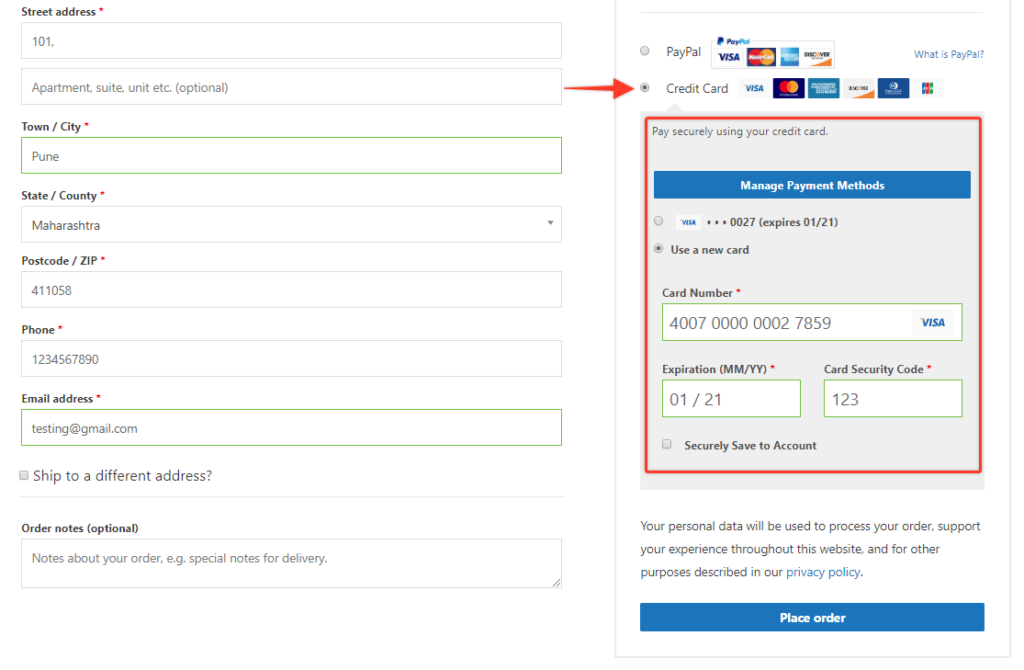
Step 3: Your Setup is complete, visit the Checkout page and you will notice the Credit Card fields for the payment provided by Authorize.Net.

Note: Your website should have an SSL configured and all the URLs should be forced to use HTTPS, otherwise your payment will not work and it will display such error messages.


