CartFlows offers the Field Control feature that allows you to have complete control over arranging the fields according to your preference. You can also change the field labels, placeholder texts, and column structures.
Step 1. From your WordPress dashboard, go to CartFlows > Funnels. Select a Flow and click Edit.
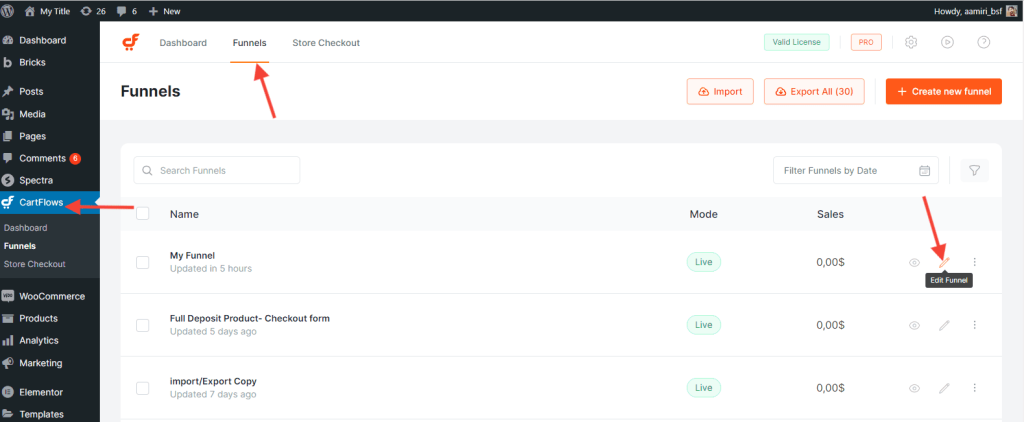
Step 2. Click Edit on the Checkout Page.
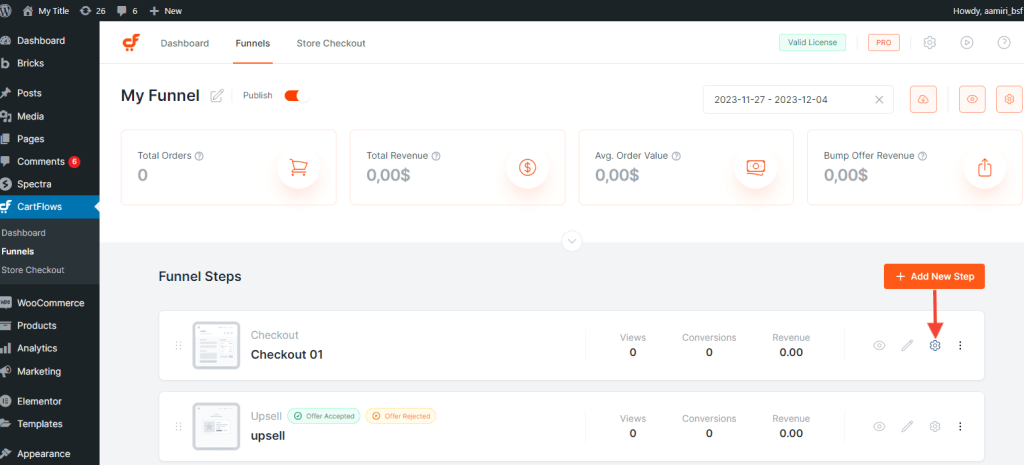
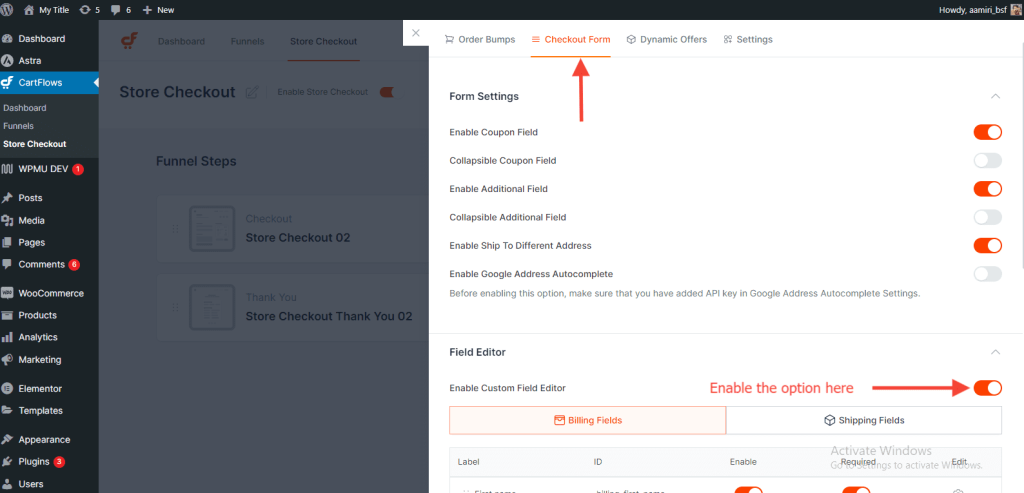
Step 3. Select the Checkout Form tab and toggle the Enable Custom Field Editor checkout.
You’ll find the billing and shipping checkout fields that are displayed on your checkout form. If you expand a field by clicking the setting option on the right-hand side of the field, you’ll see the following options that you can customize according to your liking:
Below the field descriptions –
Field Width – the percentage of space in a row that the field occupies
Field Label – the name of the field

Default – the default value of the field
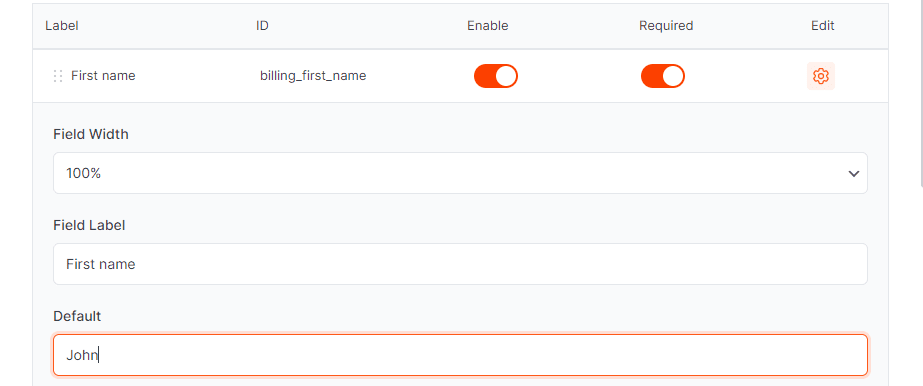

Placeholder – the placeholder text inside the field. Note that it will not display if there is an assigned Default value.
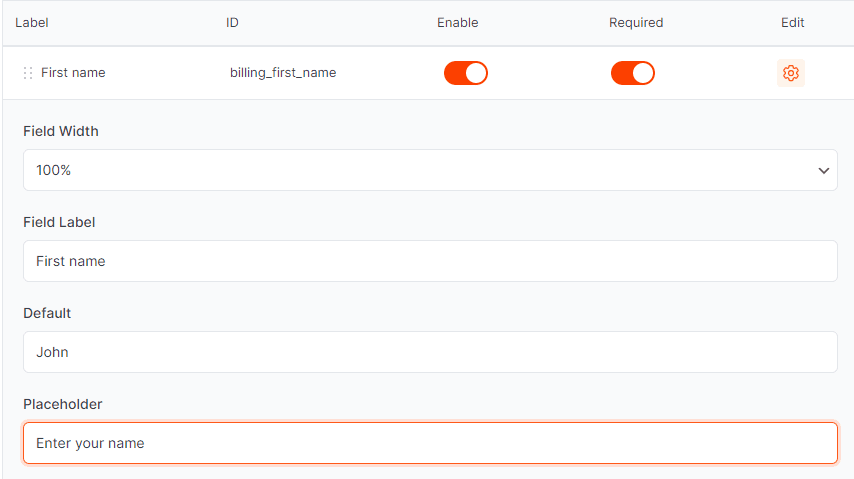

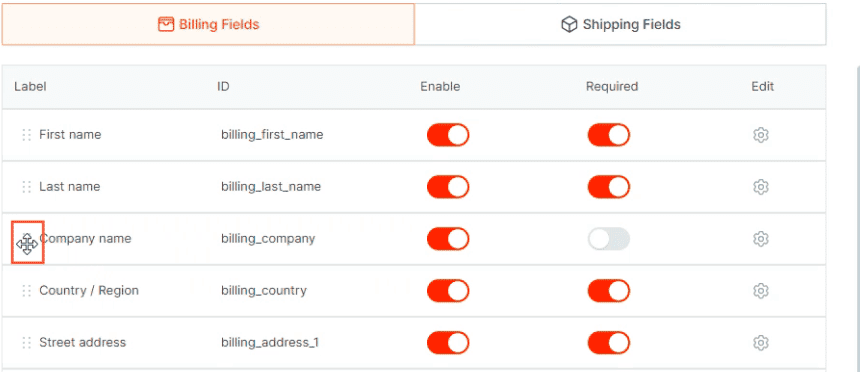
Required – Switch the toggle if you want the field to be a mandatory field


Eye icon – enable/disable if you want the field to be displayed/hidden, respectively, in the form

Drag and Drop – when the mouse cursor is a four-headed arrow, that means you can drag and drop the field to any order that you want
Add New Custom Field – allows you to enter an additional field in the Billing or Shipping section of the checkout form. You can add a Text, Textarea, Select, Checkbox, or Hidden field type. Once you’re done setting up the field, simply click on Add New Field and Update the step. This will update the checkout page to reflect the additional field.
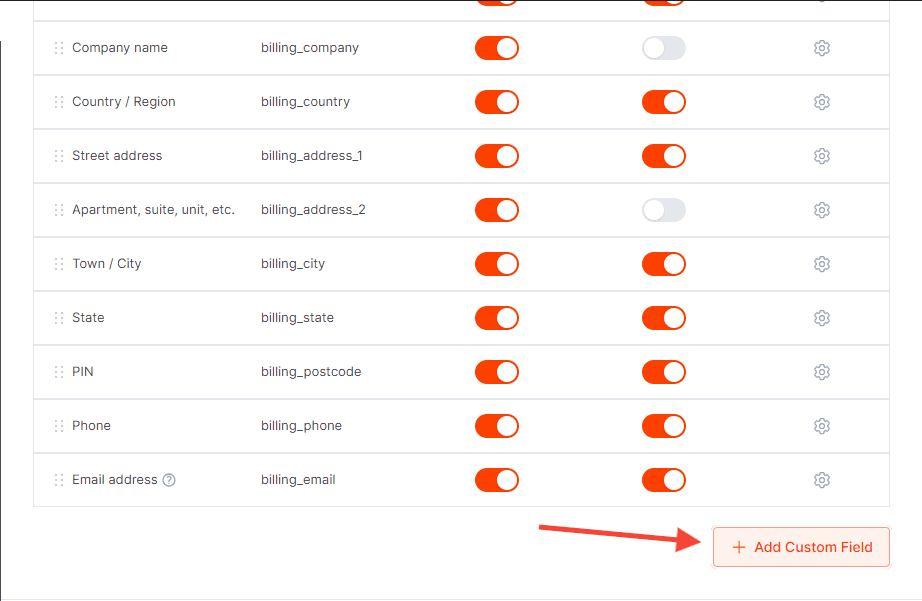
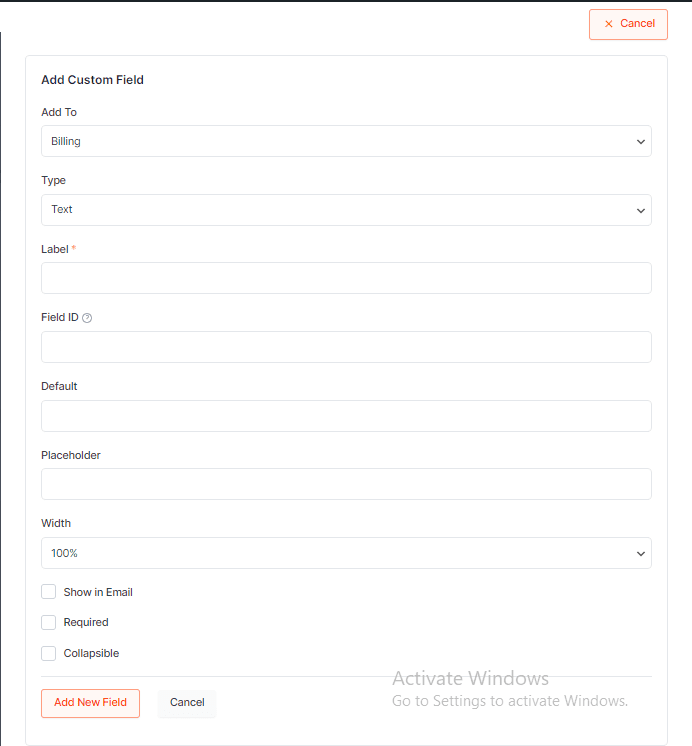
Note: The addition of custom fields is a feature exclusively available with the CartFlows Pro plans.


