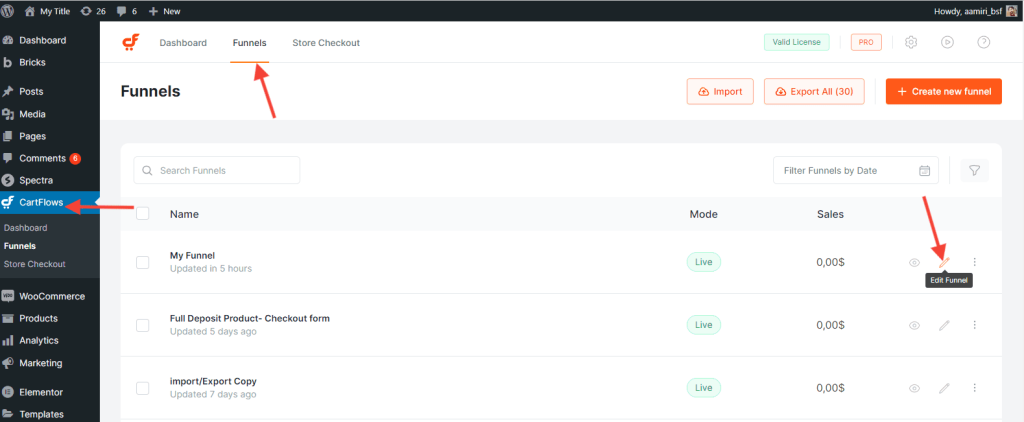
You can customize the way your Checkout Page looks simply by tweaking the configurations in the Checkout Layout section of the Checkout Step. To do this, from your WordPress admin dashboard, go to CartFlows menu > Funnels. Select a Flow and Edit.
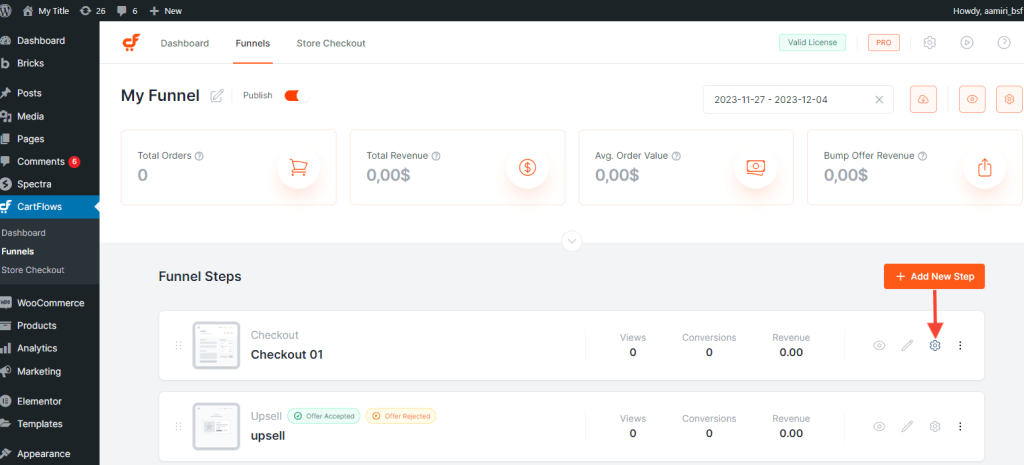
Click the corresponding Settings option for the Checkout Step in the Funnel.
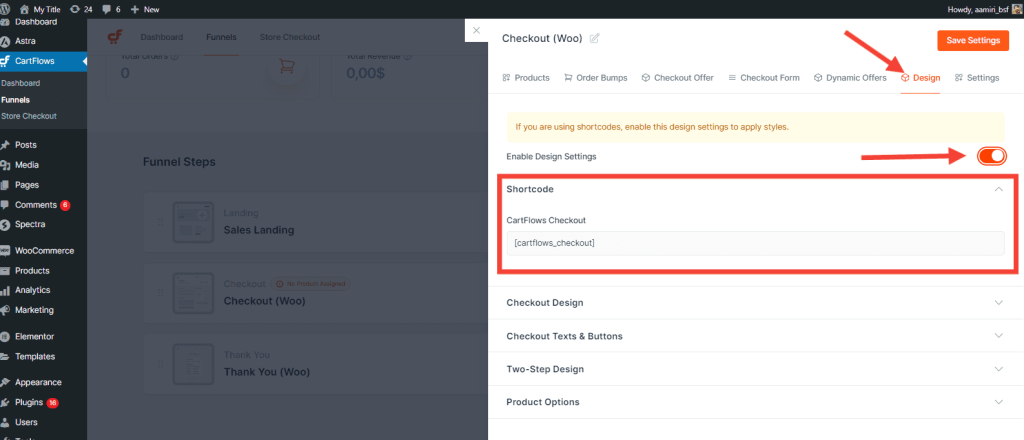
Upon clicking the “Settings” option, a tab smoothly slides into view, unveiling an array of available options and settings for your exploration.
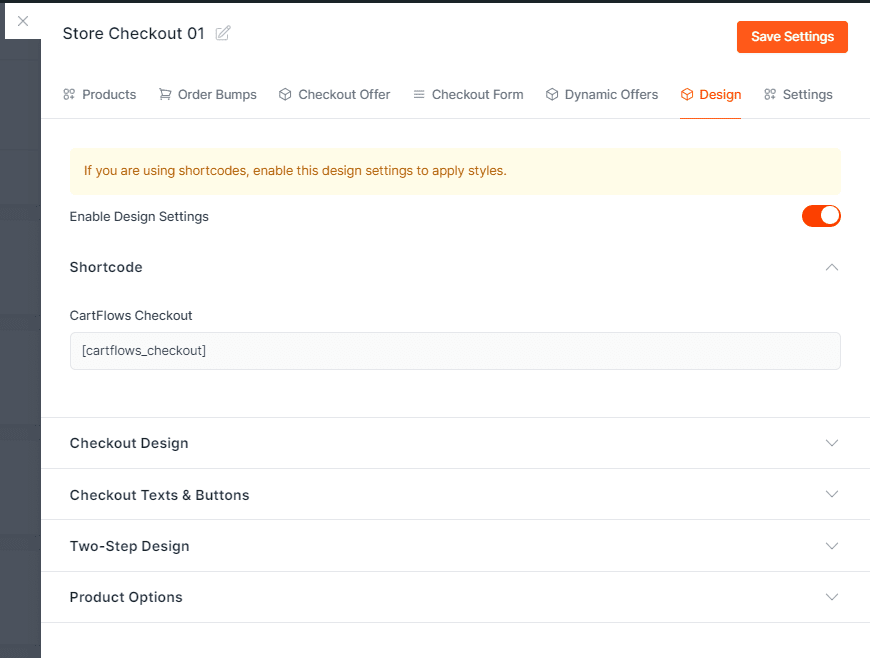
Shortcodes
This is where you can find the shortcode which you can add to your checkout page. It contains the billing checkout fields, shipping checkout fields, order details, and the Place Order button.
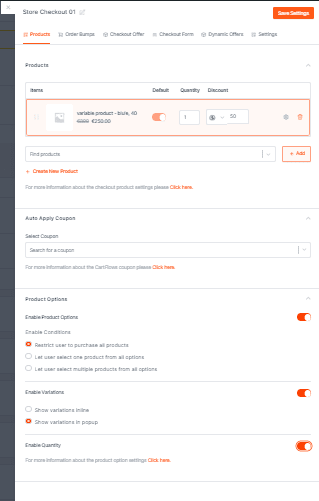
Select Product
This is where you add the product you would like to link to your checkout page. You can also add a coupon if you’re running a promotion for your product. Make sure that you enable coupons in the WooCommerce settings. Here, you can also configure restrictions, variations, and enable quantity.
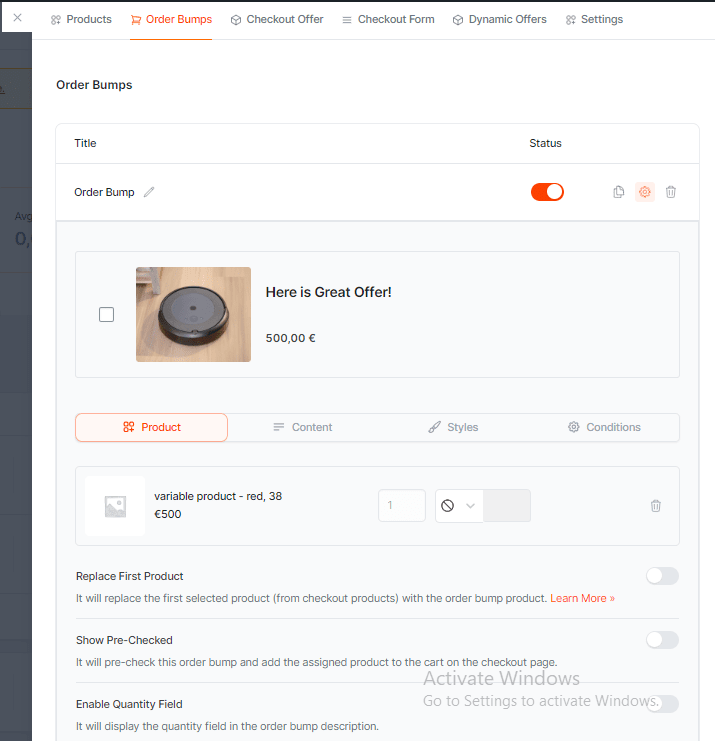
Order Bump
If you want to add order bump to your checkout page, you can simply configure it in the Order Bump menu by clicking the corresponding order bump settings.
To learn more about adding an order bump, check out this article.

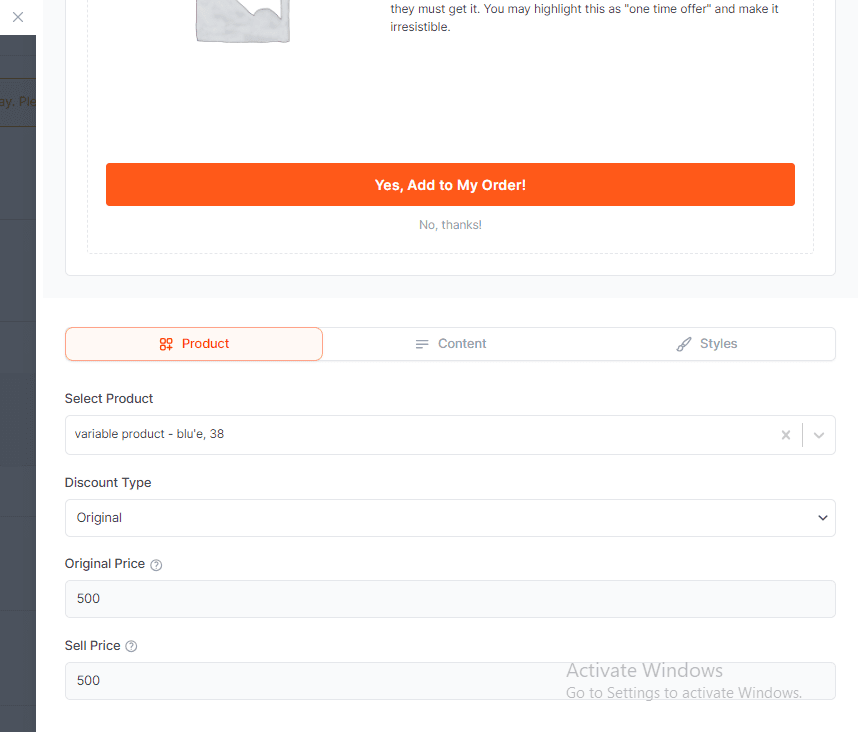
Checkout Offer
You can enable Checkout Offer if you want to offer a product or another related product to get your customers to buy more stuff before the payment is made. No matter which option they choose, yes or no, the order made is automatically processed.

Checkout Design
This is where you can customize the checkout form. You can set it as one column, two-column, or two-step. You can also change the typography and the primary color. If you enable the Advance Options, you’ll be able to customize the heading, input fields, buttons, and background color.
Checkout Fields
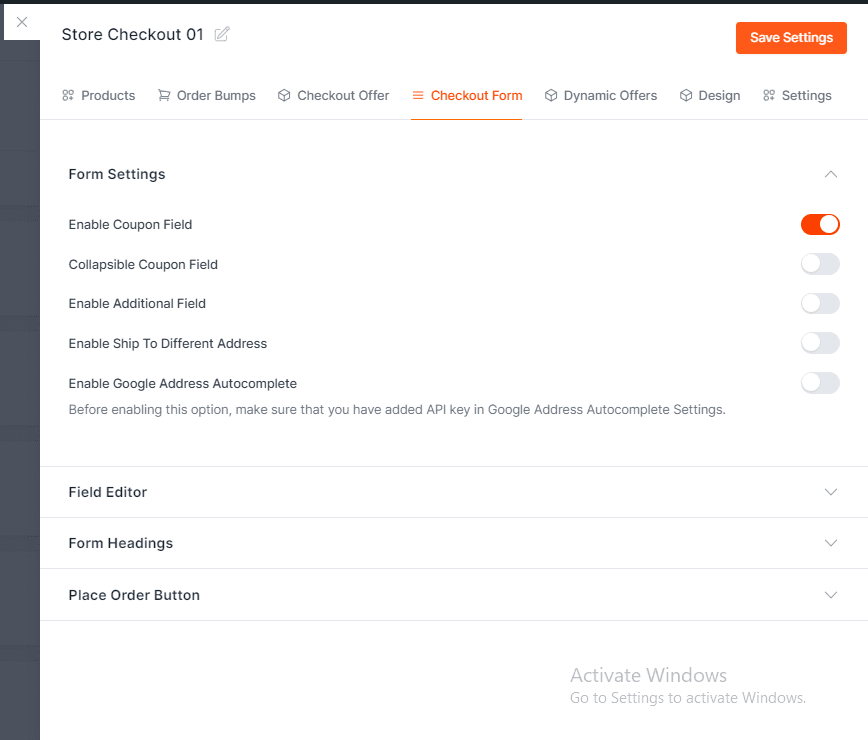
In this section, you’ll be able to customize the checkout fields.
- The Enable Coupon Field allows you to add a coupon field for the customers to enter the coupon code.
- The Enable Additional Field allows you to insert additional fields so you can get some more information about your customer.
- The Enable Ship To Different Address adds another address field for shipping.
- The Enable Google Address Autocomplete allows you to enable the Autocomplete address feature on that specific checkout. To learn more about configuring Google AutoComplete, check out this article.
Custom Script
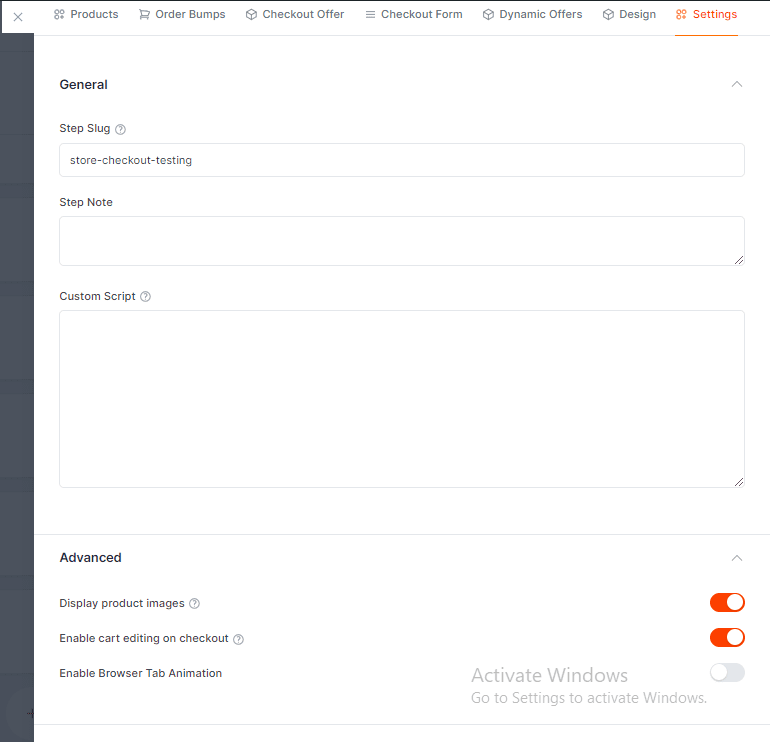
Adding a custom script allows you to add live chat, bots, custom pixels, and more to your checkout page.
